
Background: This tutorial does not use the NGSI-LD interface directly. it covers background information about Identity Management, which is then used in subsequent chapters.
Description: This tutorial is an introduction to Keycloak — an open-source Identity and Access Management solution which introduces Identity Management into FIWARE services. The tutorial explains how to create users and groups in preparation to assign roles and permissions to them in a later tutorial.
The tutorial demonstrates examples of interactions using the Keycloak Admin Console GUI, as well as cUrl commands used to access the Keycloak Admin REST API.


Identity Management
"A fence should be horse-high, pig-tight and bull-strong."
— Old Farmer's Proverb
In computer security terminology, Identity management is the security and business discipline that "enables the right individuals to access the right resources at the right times and for the right reasons".1 It addresses the need to ensure appropriate access to resources across disparate systems.
The FIWARE framework consists of a series of separate components, and the security chapter aims to implement the common needs of these components regarding who (or what) gets to access which resources within the system. Before access to resources can be locked down, the identity of the person (or service) making the request must be known. Keycloak is a production-grade open-source Identity and Access Management solution backed by Red Hat. It sets up all of the common characteristics of an Identity Management System out of the box, so that other components are able to use standard OpenID Connect and OAuth 2.0 mechanisms to accept or reject requests based on industry standard protocols.
Identity Management therefore covers the issues of how to gain an identity within the system, the protection of that identity, and the surrounding technologies such as passwords, tokens and network protocols.
Standard Concepts of Identity Management
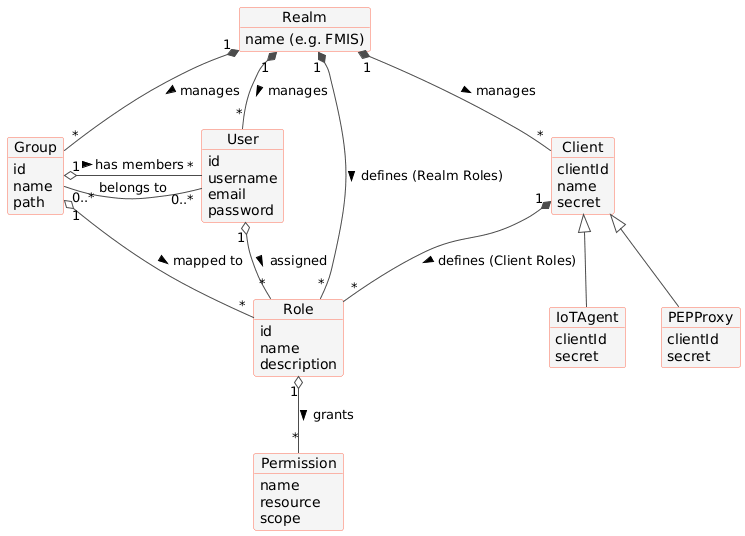
The following common objects are found within the Keycloak Identity Management system:
- User — Any registered user able to identify themselves with a username and password. Users can be assigned rights individually or as part of a group.
- Realm — A security domain that manages a set of users, credentials, roles and groups. A realm is isolated from
other realms and only manages the resources it controls. For this tutorial the realm is
farm-management. - Group — A collection of users that can be assigned a set of roles. Altering the role assignments of a group affects the access rights of all members of that group. This removes the need for a super-admin to administer all rights individually.
- Role — A label for a set of permissions. A role can be assigned to either a single user or a group. A signed-in user gains all the permissions associated with their own roles plus the roles inherited from their groups.
- Client — An application or service able to request authentication. In later tutorials the NGSI-LD context broker
proxy is registered as a client of the
farm-managementrealm.
Additionally, further non-human application objects can be secured within an application:
- IoTAgent — a proxy between IoT Sensors and the Context Broker.
- PEPProxy — a middleware for use between generic enablers challenging the rights of a user.
The relationship between the objects can be seen below:
Prerequisites
Docker
To keep things simple all components will be run using Docker. Docker is a container technology that allows different components to be isolated into their respective environments.
- To install Docker on Windows follow the instructions here.
- To install Docker on Mac follow the instructions here.
- To install Docker on Linux follow the instructions here.
Docker Compose is a tool for defining and running multi-container Docker applications. A series of *.yml files are
used to configure the required services for the application. This means all container services can be brought up with a
single command. Docker Compose is installed by default as part of Docker Desktop. If you are running Linux, you can
check the instructions here.
You can check your current Docker and Docker Compose versions using the following commands:
docker version
docker compose version
Please ensure that you are using Docker version 24.0 or higher and Docker Compose version 2.24 or higher, and upgrade if necessary.
WSL
The Windows Subsystem for Linux allows you to run a Linux binary executable natively on Windows. If you are on Windows and prefer to run tutorials via Linux, install WSL2 and apply any pending updates before starting.
Architecture
This introduction makes use of one open-source component — Keycloak. User data is persisted in a PostgreSQL database.
The overall architecture consists of the following elements:
-
One Identity and Access Management component:
- Keycloak provides a complete Identity Management System including:
- An authentication and authorisation server for applications and users
- An Admin Console GUI for Identity Management administration
- A fully featured REST API for Identity Management via HTTP
- Keycloak provides a complete Identity Management System including:
-
One PostgreSQL database:
- Used to persist Keycloak realm data, users, groups, roles and sessions
Since all interactions between the elements are initiated by HTTP requests, the entities can be containerized and run from exposed ports.
Keycloak Configuration
keycloak:
    image: quay.io/keycloak/keycloak:24.0.1
    container_name: fiware-keycloak
    hostname: keycloak
    depends_on:
        postgres-keycloak:
            condition: service_healthy
    ports:
        - "3005:8080"
    environment:
        - KC_DB=postgres
        - KC_DB_URL=jdbc:postgresql://postgres-keycloak/keycloak
        - KC_DB_USERNAME=keycloak
        - KC_DB_PASSWORD=password
        - KC_BOOTSTRAP_ADMIN_USERNAME=admin
        - KC_BOOTSTRAP_ADMIN_PASSWORD=1234
        - KC_HTTP_PORT=8080
        - KC_HOSTNAME_STRICT=false
        - KC_HTTP_ENABLED=true
        - KC_HEALTH_ENABLED=true
    command: start-dev --import-realm
    volumes:
        - ./realm-config:/opt/keycloak/data/import:ro
The keycloak container is a web application listening on port 8080 internally. Port 3005 has been exposed on the
host to allow browser and REST API access.
The keycloak container is driven by environment variables as shown:
| Key | Value | Description |
|---|---|---|
KC_DB |
postgres |
Database type — Keycloak requires PostgreSQL in this configuration |
KC_DB_URL |
jdbc:postgresql://postgres-keycloak/keycloak |
JDBC connection string for the PostgreSQL database |
KC_DB_USERNAME |
keycloak |
Database username |
KC_DB_PASSWORD |
password |
Database password — use Docker Secrets or a vault in production |
KC_BOOTSTRAP_ADMIN_USERNAME |
admin |
Initial admin username for the master realm |
KC_BOOTSTRAP_ADMIN_PASSWORD |
1234 |
Initial admin password — change immediately in any non-tutorial context |
KC_HTTP_PORT |
8080 |
Internal HTTP port |
KC_HOSTNAME_STRICT |
false |
Disables strict hostname validation — suitable for tutorial use only |
KC_HTTP_ENABLED |
true |
Enables plain HTTP — use HTTPS in production |
KC_HEALTH_ENABLED |
true |
Enables /health/ready endpoint used by the Docker health check |
The start-dev command starts Keycloak in development mode. The --import-realm flag causes Keycloak to import any
realm JSON files found in the /opt/keycloak/data/import/ directory at startup. The realm-config/ directory of this
tutorial contains farm-management-realm.json, which defines the farm-management realm and its initial groups.
Note :
In a production environment, Keycloak should be started with the
startcommand (notstart-dev), TLS should be configured, and secrets should be managed through a vault or Docker Secrets rather than plain-text environment variables.
PostgreSQL Configuration
postgres-keycloak:
    image: postgres:15
    container_name: db-postgres
    hostname: postgres-keycloak
    environment:
        - POSTGRES_DB=keycloak
        - POSTGRES_USER=keycloak
        - POSTGRES_PASSWORD=password
    volumes:
        - postgres-db:/var/lib/postgresql/data
    healthcheck:
        test: ["CMD", "pg_isready", "-U", "keycloak"]
        interval: 5s
        timeout: 5s
        retries: 10
The postgres-keycloak container is listening on its default port 5432 (internal only — not exposed to the host).
| Key | Value | Description |
|---|---|---|
POSTGRES_DB |
keycloak |
Name of the database created on first start |
POSTGRES_USER |
keycloak |
Database superuser username |
POSTGRES_PASSWORD |
password |
Database superuser password |
Start Up
To start the installation, do the following:
git clone https://github.com/FIWARE/tutorials.Identity-Management.git
cd tutorials.Identity-Management
git checkout NGSI-LD

./services create
Note :
The initial creation of Docker images can take up to three minutes
Thereafter, all services can be initialized from the command-line by running the services Bash script provided within the repository:
./services start
Note :
If you want to clean up and start over again, run the following command:
console
./services stop
Reading the Keycloak Admin API
All Identity Management records and relationships can be queried using the Keycloak Admin REST API. Once running, the
API is accessible at http://localhost:3005/admin/realms/. The Admin Console GUI is available at
http://localhost:3005.
All Admin API calls require an admin Bearer token in the Authorization header. This token is obtained from the
/realms/master/protocol/openid-connect/token endpoint (see Obtain an Admin Token below).
UUIDs within Keycloak
All IDs within Keycloak are UUIDs generated at creation time and immutable thereafter. The following placeholder values appear throughout this tutorial and must be replaced with the actual IDs returned by your running instance:
| Key | Description | Sample Value |
|---|---|---|
{{token}} |
Admin Bearer token obtained from the master realm | eyJhbGciOiJSUzI1NiIsInR5cCI6IkpXVC... |
{{user-id}} |
UUID of an existing user in the farm-management realm |
96154659-cb3b-4d2d-afef-18d6aec0518e |
{{group-id}} |
UUID of an existing group in the farm-management realm |
74f5299e-3247-468c-affb-957cda03f0c4 |
Tokens expire after a configurable period (default 5 minutes in Keycloak). Re-run Request 1️⃣ to obtain a fresh token if
subsequent requests return 401 Unauthorized.
Logging In
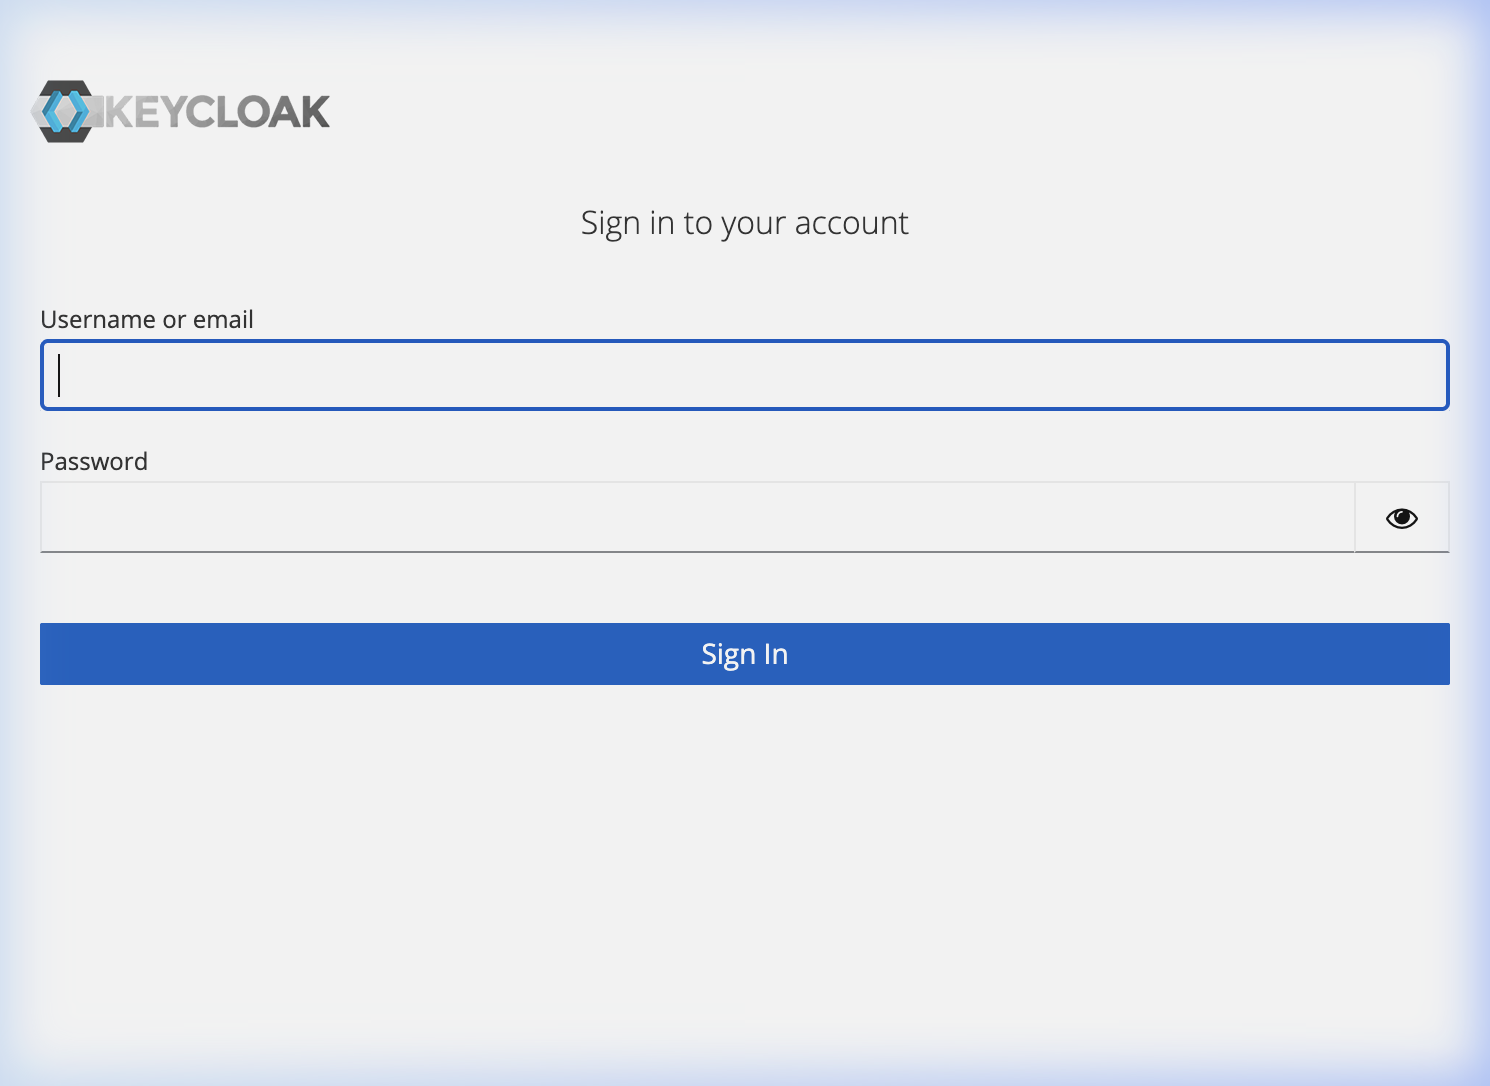
The Admin Console at http://localhost:3005 is the primary GUI for Keycloak administration. Log in with the username
admin and password 1234 to access the master realm.
To work within the farm-management realm, select it from the realm drop-down in the top-left corner.
Obtain an Admin Token
The following request logs into the master realm using the admin credentials and returns a JWT access token. This token
is required as a Bearer credential for all subsequent Admin API calls.
1️⃣ Request:
curl -iX POST \
  'http://localhost:3005/realms/master/protocol/openid-connect/token' \
  -H 'Content-Type: application/x-www-form-urlencoded' \
  --data-urlencode 'grant_type=password' \
  --data-urlencode 'client_id=admin-cli' \
  --data-urlencode 'username=admin' \
  --data-urlencode 'password=1234'
Response:
The response returns an access_token (a signed JWT), a refresh_token, and expiry information.
{
    "access_token": "eyJhbGciOiJSUzI1NiIsInR5cCIgOiAiSldUIiwia2lkIiA6ICJhZ...",
    "expires_in": 60,
    "refresh_expires_in": 1800,
    "refresh_token": "eyJhbGciOiJIUzI1NiIsInR5cCIgOiAiSldUIiwia2lkIiA6ICJh...",
    "token_type": "Bearer",
    "not-before-policy": 0,
    "session_state": "a2fb843b-4a60-4a7d-8c3d-3f96e12e9eba",
    "scope": "profile email"
}
Store the access_token value as {{token}} for use in subsequent requests.
Retrieve User Details from a Token
Once a token has been obtained, it can be decoded to inspect the identity of the authenticated user. The Keycloak UserInfo endpoint returns the claims from the token without requiring local JWT decoding.
2️⃣ Request:
curl -X GET \
  'http://localhost:3005/realms/farm-management/protocol/openid-connect/userinfo' \
  -H 'Authorization: Bearer {{token}}'
Response:
{
    "sub": "3b3a5ad5-afd3-4baa-a538-25c7fe7cbf6a",
    "email_verified": true,
    "preferred_username": "alice",
    "given_name": "Alice",
    "family_name": "Administrator",
    "email": "alice@fiware.farm"
}
Refresh a Token
Tokens have a limited lifespan. The refresh_token returned in Request 1️⃣ can be exchanged for a fresh access token
without requiring the user to re-authenticate.
3️⃣ Request:
curl -iX POST \
  'http://localhost:3005/realms/master/protocol/openid-connect/token' \
  -H 'Content-Type: application/x-www-form-urlencoded' \
  --data-urlencode 'grant_type=refresh_token' \
  --data-urlencode 'client_id=admin-cli' \
  --data-urlencode 'refresh_token={{refresh_token}}'
Response:
A new access_token and refresh_token pair is returned with updated expiry times.
{
    "access_token": "eyJhbGciOiJSUzI1NiIsInR5cCIgOiAiSldUIiwia2lkIiA6ICJhZ...",
    "expires_in": 60,
    "refresh_expires_in": 1800,
    "refresh_token": "eyJhbGciOiJIUzI1NiIsInR5cCIgOiAiSldUIiwia2lkIiA6ICJh...",
    "token_type": "Bearer"
}
Administrating User Accounts
User accounts are at the heart of any identity management system. Each account holds a unique username and email address to identify the user, along with a password for authentication.
As the default super-admin user admin with a password of 1234, a series of user accounts will be set up and assigned
to relevant groups within the system.
Dramatis Personae
The following people legitimately have accounts within the farm management application:
- Alice, System Administrator — she manages all Keycloak configuration
- Bob, Farm Owner and General Manager — he has full access to all farm context data
- Carol, Livestock Manager — she supervises:
- Frank, Livestock Field Worker
- Grace, Livestock Field Worker
- Dave, Crop and Irrigation Manager — he supervises:
- Harry, Irrigation Operator
- Eve, Equipment Manager — she supervises:
- Ivy, Tractor Operator
- Jenny, External Veterinarian — read-only access to animal health data
- Ken, External Agronomist — read-only access to soil and crop data
The following people have no legitimate access and should be denied:
- Mallory, Malicious actor
User CRUD Actions
GUI
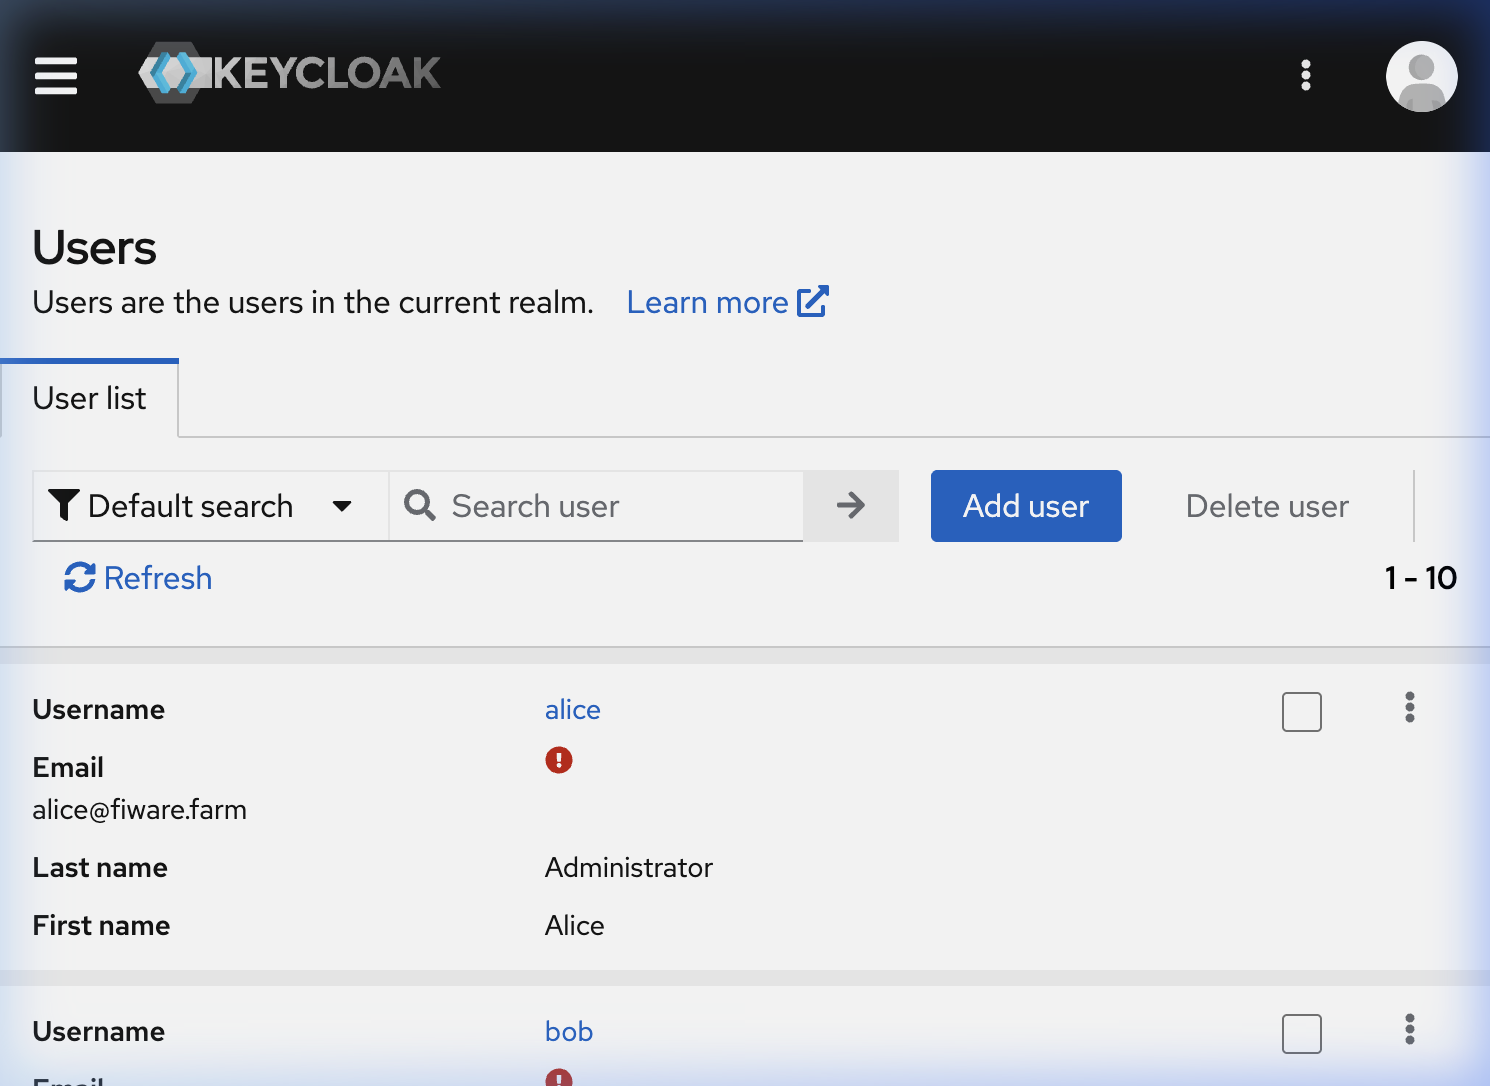
Users can be created in the Keycloak Admin Console at http://localhost:3005.
Navigate to: Realm: farm-management → Users → Add user
Enter the username, email, first and last name, then enable the account. After saving, go to the Credentials tab and
set a password with Temporary set to Off.
REST API
The Admin REST API allows user creation and management without requiring GUI interaction — useful for automated provisioning and bulk operations.
All CRUD actions for Users require an Authorization: Bearer {{token}} header from a previously obtained admin token.
Creating Users
To create a new user, send a POST request to the /admin/realms/{realm}/users endpoint.
4️⃣ Request:
curl -iX POST \
  'http://localhost:3005/admin/realms/farm-management/users' \
  -H 'Authorization: Bearer {{token}}' \
  -H 'Content-Type: application/json' \
  -d '{
    "username": "alice",
    "firstName": "Alice",
    "lastName": "Administrator",
    "email": "alice@fiware.farm",
    "enabled": true,
    "credentials": [{"type": "password", "value": "test", "temporary": false}]
  }'
Response:
A 201 Created response with no body is returned on success. The Location header contains the URL of the newly
created user, from which the UUID can be extracted.
HTTP/1.1 201 Created
Location: http://localhost:3005/admin/realms/farm-management/users/3b3a5ad5-afd3-4baa-a538-25c7fe7cbf6a
Read Information About a User
To read the details of a user, send a GET request to /admin/realms/{realm}/users/{user-id}.
5️⃣ Request:
curl -X GET \
  'http://localhost:3005/admin/realms/farm-management/users/{{user-id}}' \
  -H 'Authorization: Bearer {{token}}'
Response:
{
    "id": "3b3a5ad5-afd3-4baa-a538-25c7fe7cbf6a",
    "createdTimestamp": 1690718400000,
    "username": "alice",
    "enabled": true,
    "emailVerified": false,
    "firstName": "Alice",
    "lastName": "Administrator",
    "email": "alice@fiware.farm"
}
List all Users
To list all users within the farm-management realm, send a GET request to /admin/realms/{realm}/users.
6️⃣ Request:
curl -X GET \
  'http://localhost:3005/admin/realms/farm-management/users' \
  -H 'Authorization: Bearer {{token}}'
Response:
[
    {
        "id": "3b3a5ad5-afd3-4baa-a538-25c7fe7cbf6a",
        "username": "alice",
        "firstName": "Alice",
        "lastName": "Administrator",
        "email": "alice@fiware.farm",
        "enabled": true
    },
    {
        "id": "96154659-cb3b-4d2d-afef-18d6aec0518e",
        "username": "bob",
        "firstName": "Bob",
        "lastName": "Farmer",
        "email": "bob@fiware.farm",
        "enabled": true
    }
]
Update a User
To update an existing user, send a PUT request to /admin/realms/{realm}/users/{user-id} with the full updated
representation.
7️⃣ Request:
curl -iX PUT \
  'http://localhost:3005/admin/realms/farm-management/users/{{user-id}}' \
  -H 'Authorization: Bearer {{token}}' \
  -H 'Content-Type: application/json' \
  -d '{
    "username": "alice",
    "firstName": "Alice",
    "lastName": "Administrator",
    "email": "alice.admin@fiware.farm",
    "enabled": true
  }'
Response:
A 204 No Content response indicates the update was applied successfully.
Delete a User
To delete a user, send a DELETE request to /admin/realms/{realm}/users/{user-id}.
8️⃣ Request:
curl -iX DELETE \
  'http://localhost:3005/admin/realms/farm-management/users/{{user-id}}' \
  -H 'Authorization: Bearer {{token}}'
Response:
A 204 No Content response indicates the user was deleted.
Grouping User Accounts under Groups
In Keycloak, Groups are collections of users that can be assigned roles collectively. When a role is assigned to a group, all members of that group inherit that role. This allows a department head to manage team access without requiring a super-admin to adjust every individual user account.
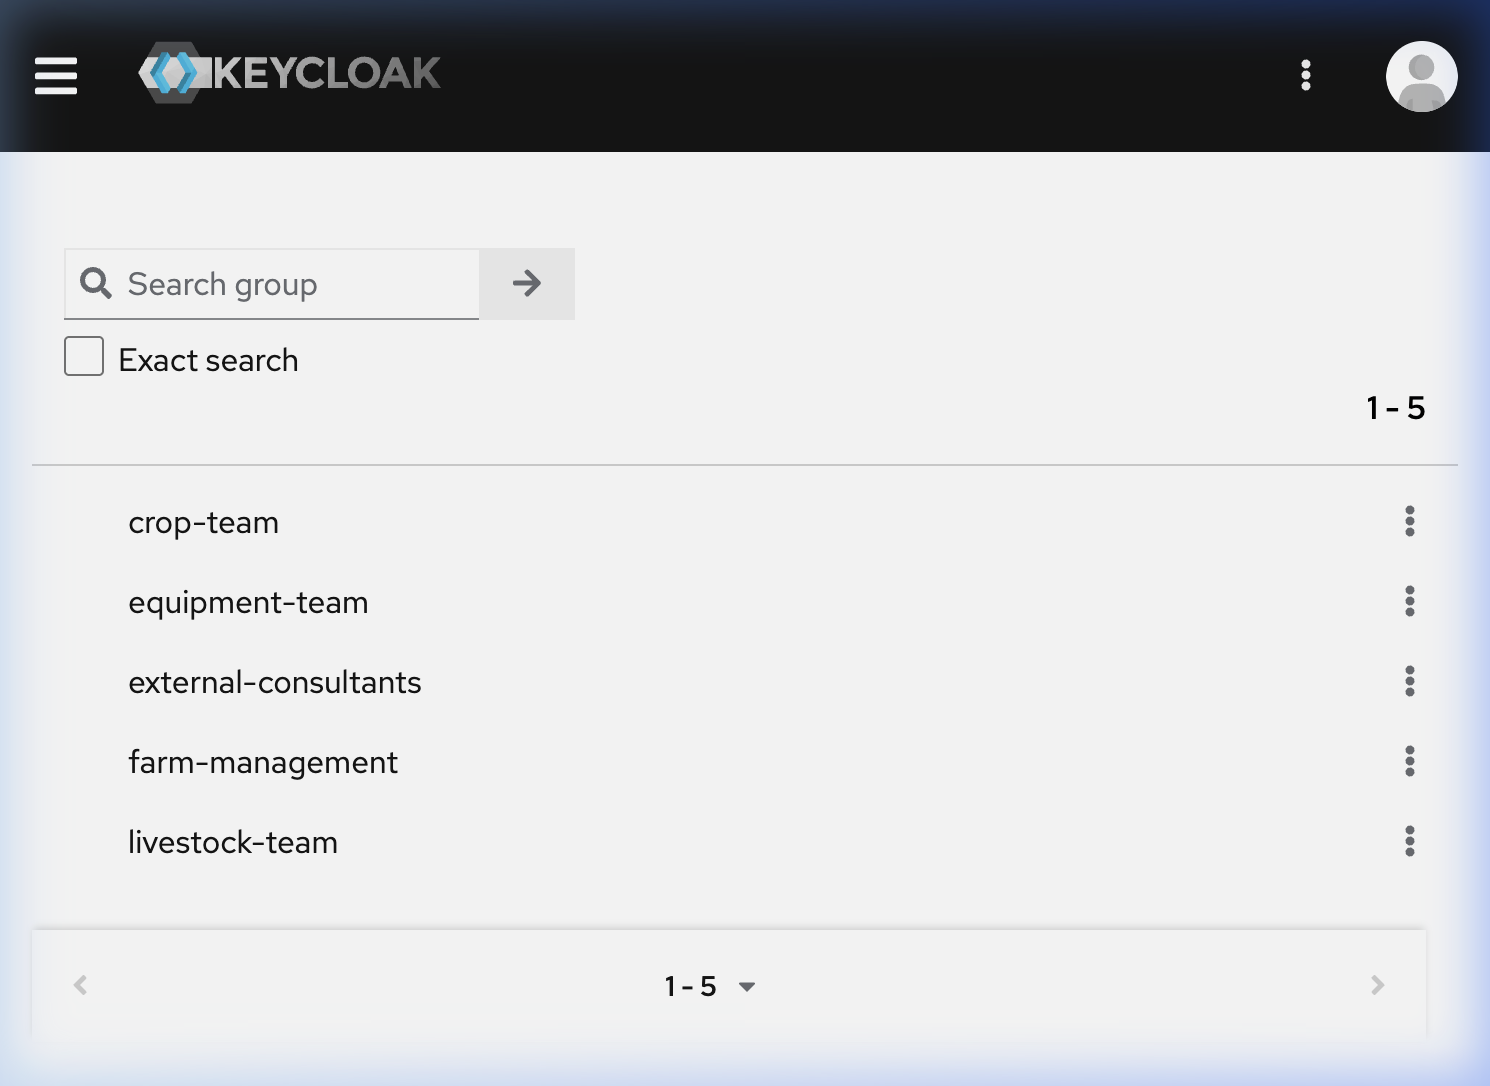
The farm-management realm is pre-configured with the following groups, created from the realm import file:
| Group Name | Description |
|---|---|
farm-management |
Farm owner and general management staff |
livestock-team |
Livestock supervisors and field workers |
crop-team |
Crop and irrigation supervisors and workers |
equipment-team |
Equipment and machinery supervisors |
external-consultants |
External specialists with read-only access |
Group CRUD Actions
GUI
Groups are managed in the Admin Console at Realm: farm-management → Groups → Create group.
REST API
Create a Group
9️⃣ Request:
curl -iX POST \
  'http://localhost:3005/admin/realms/farm-management/groups' \
  -H 'Authorization: Bearer {{token}}' \
  -H 'Content-Type: application/json' \
  -d '{"name": "drone-operators"}'
Response:
HTTP/1.1 201 Created
Location: http://localhost:3005/admin/realms/farm-management/groups/e424ed98-c966-46e3-b161-a165fd31bc01
Read Group Details
1️⃣0️⃣ Request:
curl -X GET \
  'http://localhost:3005/admin/realms/farm-management/groups/{{group-id}}' \
  -H 'Authorization: Bearer {{token}}'
Response:
{
    "id": "74f5299e-3247-468c-affb-957cda03f0c4",
    "name": "livestock-team",
    "path": "/livestock-team",
    "subGroupCount": 0,
    "access": {
        "view": true,
        "viewMembers": true,
        "manageMembers": true,
        "manage": true,
        "manageMembership": true
    }
}
List all Groups
1️⃣1️⃣ Request:
curl -X GET \
  'http://localhost:3005/admin/realms/farm-management/groups' \
  -H 'Authorization: Bearer {{token}}'
Response:
[
    { "id": "...", "name": "crop-team", "path": "/crop-team" },
    { "id": "...", "name": "equipment-team", "path": "/equipment-team" },
    { "id": "...", "name": "external-consultants", "path": "/external-consultants" },
    { "id": "...", "name": "farm-management", "path": "/farm-management" },
    { "id": "...", "name": "livestock-team", "path": "/livestock-team" }
]
Update a Group
1️⃣2️⃣ Request:
curl -iX PUT \
  'http://localhost:3005/admin/realms/farm-management/groups/{{group-id}}' \
  -H 'Authorization: Bearer {{token}}' \
  -H 'Content-Type: application/json' \
  -d '{"name": "livestock-and-dairy-team"}'
Response:
A 204 No Content response indicates the group was updated.
Delete a Group
1️⃣3️⃣ Request:
curl -iX DELETE \
  'http://localhost:3005/admin/realms/farm-management/groups/{{group-id}}' \
  -H 'Authorization: Bearer {{token}}'
Response:
A 204 No Content response indicates the group was deleted. Members of the group are not deleted; they simply lose any
roles that were assigned at the group level.
Users within a Group
Add a User as a Member of a Group
To add a user to a group, send a PUT request to /admin/realms/{realm}/users/{user-id}/groups/{group-id}. Both the user
ID and group ID must be known before this call can be made. Use the List users and List groups endpoints to retrieve
them.
1️⃣4️⃣ Request:
curl -iX PUT \
  'http://localhost:3005/admin/realms/farm-management/users/{{user-id}}/groups/{{group-id}}' \
  -H 'Authorization: Bearer {{token}}'
Response:
A 204 No Content response indicates the user was added to the group.
List Users within a Group
1️⃣5️⃣ Request:
curl -X GET \
  'http://localhost:3005/admin/realms/farm-management/groups/{{group-id}}/members' \
  -H 'Authorization: Bearer {{token}}'
Response:
[
    {
        "id": "7b2a1e8f-3c4d-5e6f-7a8b-9c0d1e2f3a4b",
        "username": "carol",
        "firstName": "Carol",
        "lastName": "Livestock",
        "email": "carol@fiware.farm",
        "enabled": true
    },
    {
        "id": "8c3b2f9e-4d5e-6f7a-8b9c-0d1e2f3a4b5c",
        "username": "frank",
        "firstName": "Frank",
        "lastName": "Worker",
        "email": "frank@fiware.farm",
        "enabled": true
    }
]
Remove a User from a Group
1️⃣6️⃣ Request:
curl -iX DELETE \
  'http://localhost:3005/admin/realms/farm-management/users/{{user-id}}/groups/{{group-id}}' \
  -H 'Authorization: Bearer {{token}}'
Response:
A 204 No Content response indicates the user was removed from the group. The user account itself is not deleted.
Next Steps
Want to learn how to add more complexity to your application by adding advanced features? You can find out by reading the other NGSI-LD tutorials.
- Referring to the definition from the OASIS standard.